Alison Watt Exhibition

Tonight I went to the private viewing of the Alison Watt exhibition at Perth Museum and Art Gallery. Alison is a well known figure on the Scottish Contemporary art scene, and I remember first encountering her work about 15 years ago, in a small gallery in St Andrews. Originally a painter of figures, and often nudes, she has won awards from the National Portrait Gallery.

Image

When I first came across her work, she had just begun painting large canvasses of white fabric, detailing all the creases and folds. I remember admiring these pieces at the time, as they had a really calming, serene effect, and the scale of them was impressive.

The show I saw tonight included some earlier works, but also her more recent works, which were all “fabric” paintings. Particularly memorable was a  piece of blue fabric which was almost like a sort of damask with a silky pattern on it, a technically demanding piece and beautifully executed. Standing beside it was something else that caught my attention…my favourite writer Ian Rankin, creator of the Edinburgh detective Rebus. Apparently he is a big fan of Alison’s and has a few of her pieces.

Most of the pieces were her famous white fabric paintings, which I must confess attract me, as some of my recent work seems to involve the process of wrapping, and also the white minimalism which I love.

Image

The folds in the cloth often seem to mimic the human, especially the female form. It is as if she is attempting to record a ghost image of what was lying under or on the sheets. Up close, the painting above doesn’t really look terribly realistic, in fact I hate to admit that it almost looked a bit laboured and amateur, like a piece from a school portfolio. But standing back about 5 metres, you begin to get the desired effect: the canvas becomes a draped piece of cloth, with folds rising and falling over one another. It is pure and pristine, and you can almost smell the freshly laundered cotton. In fact it almost makes you want to wrap yourself in it and shelter in its peaceful comfort.

Image

Phantom (2007)  Oil on canvas Dimensions: 213.4 x 335.3cm

The idea of leaving a trace or a mould of an entity which was once present was a similar concept to my wrappings and moulds of trees which I produced as part of the Exploratory Project.  Tinder I and Tinder II involved wrapping baby wipes around logs which had once been healthy beech branches, but had fallen from their majestic grace and succumbed to infection and rot.

ImageTinder I

tinder2bTinder II

These gnarled branches are now ‘ghost sculptures’, shells of what used to be, like a shed skin, or empty cocoon. Like Alison’s absent figures, these pieces depict absent parts of the landscape, their forms captured in a pure and simplistic way. The lack of colour draws our attention to the form itself, and also to the surrounding shadows which it casts, like spirits trying in vain to cling to their former self.

For my next wrapping pieces, I have a notion to use silk, as it is more of a natural material and comes in larger sizes, which would allow me to wrap the whole item in one piece, rather than the patchwork effect of using smaller wraps. The whole idea of the wrapping is now leading me to think that I am perhaps subconsciously wanting to care for or look after these unwanted fragments of nature, in hope that they will feel wanted or loved.
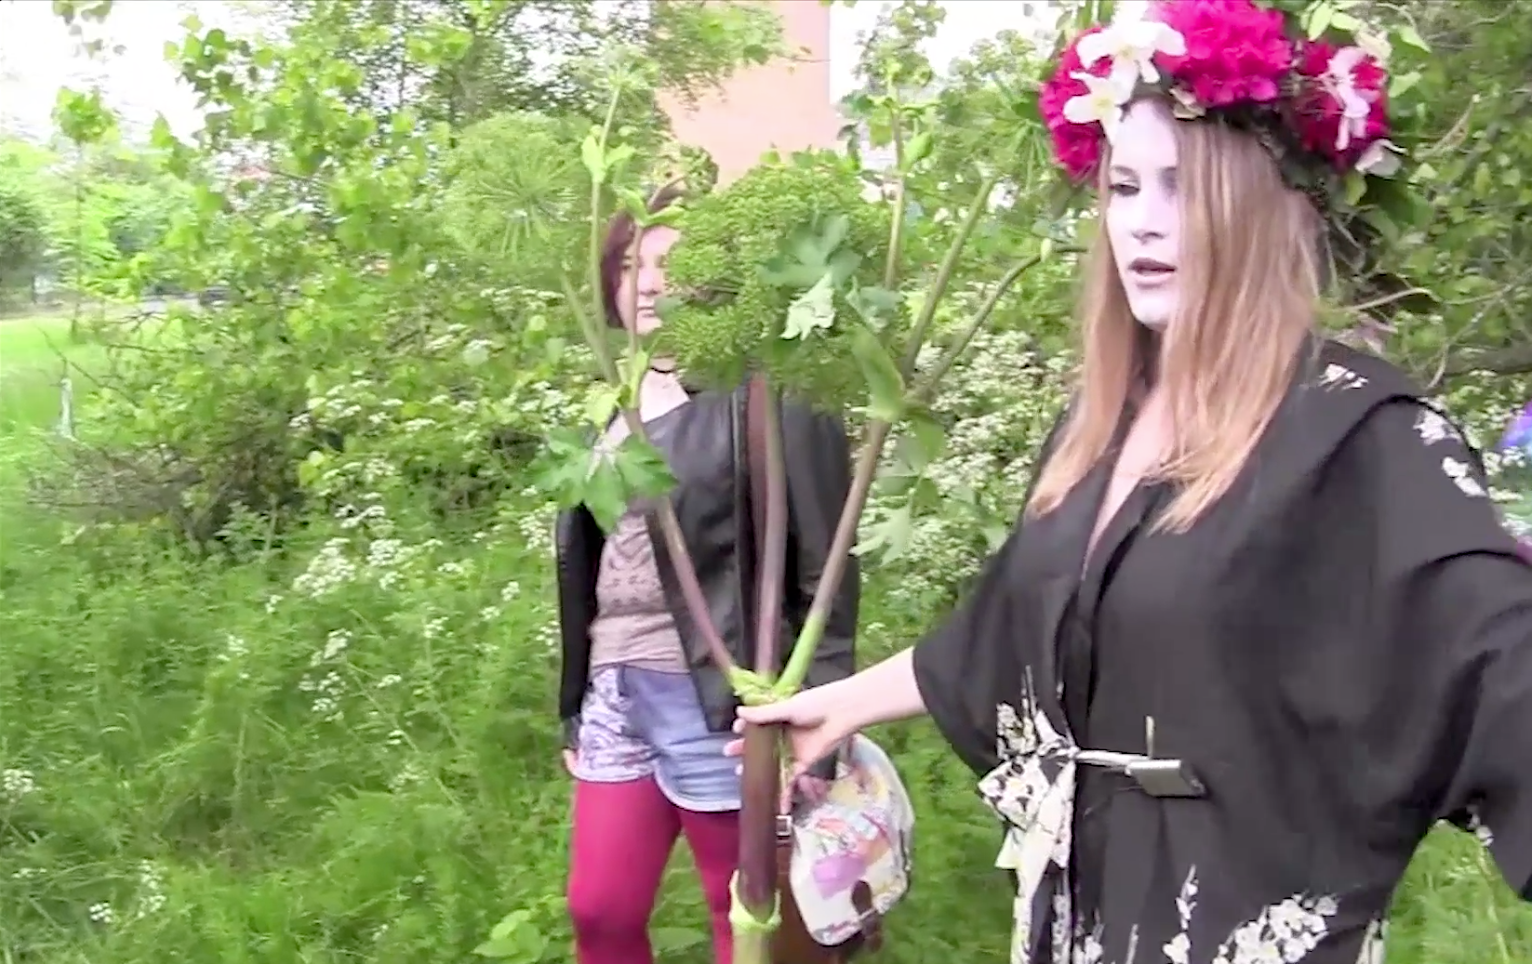
The Magic Dyepot

Performance art is something which I have never tried, but decided that it would be my final “experiment” for the Exploratory Project. Having investigated the process of making and using natural dyes, I decided that it would be good to celebrate the ritual of dyeing with a performance in which an audience was invited to participate. I had been reading  about a number of performance artists over the past few weeks in Heartney’s Art and Today : Art and Audience,  Nato Thompson’s Living as Form : Socially Engaged Art from 1991-2011 and also in Bourriaud’s Relational Aesthetics. These books have highlighted the diversity of the art of performance and social engagement, and the clever and bizarre ways in which they capture the viewer’s imagination, and participation. magicdye I sent out invitations to students and staff at college, with a tear off slip at the bottom of the invite, on which the participant was asked to write a wish which would then be added to the dyepot with a plant or flower that they had picked. Having been inspired by the “Weedrobes” of Nicole Dextras and the Beltane Fire Festival costumes, I decided to paint my face white and to make a headdress of natural flowers (with a couple of invasive plants added in there- ivy and rhododendron).  I made a wand/ “spurtle” for stirring the dyepot from a silver birch branch, which I decorated with ribbons. Silver birch is a tree with magical properties and was traditionally used to make maypoles. I had to wait until the morning of the performance to make the flower crown as it would have wilted after a couple of hours. I picked flowers from the garden and also rhododendrons and ivy from the churchyard across from my house.  I also decided to cut some stalks from my angelica “triffid” which is about 8ft tall, as I could use this as a prop in the ceremony. I arrived about 10am,  to set up a small table and stove, and filled the dyepot with boiling water. I had a few volunteers who helped to tie coloured ribbons on branches of the trees leading up to the location. The audience gathered at the art studio at 10.30am, and we walked to a small clearing in some woodland at the edge of the college campus. When everyone was in position, I began. I wasn’t as nervous as I thought I might be, but was a bit concerned that I would get tongue tied, or forget my lines, which I had rehearsed for about an hour the previous evening. 3 The script went something like this: “Greetings, friends! Welcome to the performance of the Magic Dyepot….The art of dyeing can be traced back to primitive times, when man used dyes and pigments which he made from plants and mineral to dye animal sklns which he wore and to create wonderful cave paintings. In Scotland, dyeing was an important process and was used widely by the Celts to colour their clothing and their skin, in preparation for battle. It was a magical process, a feminine ritual which men were not permitted to attend. Today, however, everyone is welcome to participate and make your own special contribution to the Magic Dyepot. The Goddess of the Dyepot is watching over us, and when you honour her with your gifts, she will endeavour to grant your wishes and your deepest desires.  2   1Let us begin by grounding ourselves…let us all join hands, close our eyes and think beautiful and magical thoughts…. 6   4Without further ado, let us now begin…can I have the first volunteer please…(hand stirring stick to them, take angelica to bless each participant) 5   7Participants came up one by one, and after placing their offering and wish into the dyepot, handed the stick to someone else.

9 (below) Spirits of the dyepot!

810 Luckily, it went without any hitches, and was captured on film my my cameraman Will. Unfortunately, my photographer didn’t show, so most of the photos I have are screen shots, and the quality is not as great as I would have liked. At the end of the performance, I thanked everyone, and took the dyepot home with me to stew, having added my contribution to it…my crown!  I intend to stew the contents of the dyepot for a week, and then “bottle” the performance as memento. Feedback which I received from members of the audience was very positive, and I thought they all participated really well. crown I would not be averse to trying another performance in future, as having watched the footage from it, I think that I myself would have enjoyed being a member of the audience at The Magic Dyepot. The performance can be seen by following the link below:

Tinder

I found this beech log covered in Tinder fungus in the Bluebell Wood (see previous post) and really saw potential in its gnarled form. Having already used tissue paper to sculpt a small tree trunk, I had similar plans for this piece, however I realised that it would be far more challenging. For the trunk sculpture, I covered half of it at a time, and then joined the two halves together.

20140515_111100

Due to the complicated shape of this log, I decided I would have to try another technique. I started thinking about paper pulp, but then, looking around my studio, I spotted a packet of baby wipes and I had an idea.

20140511_193249

I covered the log in cling film first, then dipped the baby wipes into PVA glue, and gently wrapped them over the log. They seemed to mould to the forms pretty well, so I continued to cover the whole log with them.

I left them to dry for a couple of days and here is the result:

20140515_111043

 The result is a lightweight organic sculpture, with a frosted transparent quality

20140515_111121

The semi-transparent quality of this medium could be exploited by use of illumination. It reminds me a bit of the first piece I produced for the Take Two Influences project, where I used threads to join plastic milk bottle pieces together, and used glowing lights  to highlight the threads and netting inside.

The only issue I have with this piece is the fact that it is dirty…small particles of bark and dirt (which must have slipped through the cling film) have stuck to the material, and for me, it spoils the look of the piece.

I though about how best to present it, and after a lot of contemplation, I decided I would fix it onto a piece of canvas board, and spray the whole piece white.

20140515_175651

20140515_17571320140518_184801

‘Tinder’ (baby wipes and acrylic on board) 

I’m really quite satisfied with the final result of this, and this is a method I will employ again to document other interesting aspects of the landscape. I like the minimal, contemporary feel of this piece, and feel it was the right decision to paint it white. I will, however, try this technique using objects which are less challenging in terms of shedding residual dirt, as I still want to explore the transparency of this new material I have discovered.

The Bluebell Wood

This morning I took a trip to a nearby ‘bluebell wood’. We drove past it last night, but it was getting a bit dark, so I promised myself I would return this morning.

20140509_105452

In folklore, it was said to be bad luck to walk through a wood of bluebells, because it was full of spells. I can well understand why people believed this, as it is one of the most magical places I have ever experienced! It was considered to be the house of the flower goblin, and was also said to have fairies living inside the bells. It was said to be bad luck to pick bluebells…oops! I just picked a few to go into my dye pot, but was careful not to uproot any.

If worn as a wreath,  the wearer would be compelled to speak only the truth. This may be the origin of the “…something blue” which a bride should wear on her wedding day, as it is also a symbol of constancy.

20140508_121750

 The Latin name for the bluebell is Endymion, the lover of the moon Goddess, Selene. The goddess put Endymion into an eternal sleep, so she could enjoy his beauty all to herself.

It is an extremely poisonous plant, especially the bulb, but at present is being researched as a potential from which to develop medicine to fight cancer.

There was something extremely surreal about walking through this wood… Alone… peaceful… unspoilt…I almost expected to meet the white rabbit or some other magical creature, it was like being in a dream.

20140509_105720Lush, velvet mosses adorned the trees, and a variety of lichens, which indicate just how good the air quality is here.

20140508_123012

 Above : One of the many oak trees dripping with Oakmoss lichen

The trees in the wood are predominantly beech (below), oak and birch. Some of these trees must be at least 150 years old.

20140509_105935

This impressive beech tree (above) was starting to show some damage from fungus and storms. Near this tree, there were some fallen branches, and I noticed amazing gnarled textures on them, which I later confirmed had been caused by Tinder Fungus ( a type of fungus named after its use in kindling fires).

20140508_115607

Tinder fungus creates these amazing gnarled textures on beech trunks and branches

20140508_115549

I found a small piece of branch covered in tinder fungus which I put into my bag…I think it may make a really great sculpture, if I can take a mould or cast of it somehow.

Walking on a bit further, I encountered some bracket fungi. These are called false tinder fungus, or  hoof fungus, as they do resemble the hooves of a horse somewhat. These strange parasitic entities actually suck the life out of the trees which they are attached to, becoming so hard that they begin to grow as part of the trunk and are almost impossible to remove.

20140508_121419

20140508_121258 20140508_121215 20140508_121112

The substance found just under the skin has its uses, and is known as Amadou. When soaked, it swells, and can be flattened out to use for fuel for fires, but more bizarrely it has also been used to make hats in Eastern Europe!

20140515_162752

I couldn’t help myself from “liberating” one of the fallen trunks from these suckers…I managed to break a younger hoof off the trunk, and have plans for it when I get home!

20140508_124629

Finally I picked some nettles. Some of the leaves on these were the biggest that I had ever encountered. I’m guessing that their sting may be even more powerful, given their size, so I was very careful to use scissors when picking them.

It was certainly an amazing experience here today, and I feel that I have found a few more inspirations and materials to keep me going for another few weeks.


Tissue trunks

I found these two birch trunks a few weeks ago at Rashielea wood (see previous post) and decided to cover one of them in tissue to make a sculptural piece from it.

20140508_141845

I chose to use the one with the branch stumps, as it looks a bit more tree-like and has more of an interesting texture. I started by covering it in cling film, to allow me to remove the tissue easily once it was dry.

20140515_103616

I began to cover half of it with unbleached tissue paper and a solution of PVA and water. I used the hairdryer to speed up the process and this allowed me to rub over the dry areas to capture the texture of the tree through the paper. I reminds me of the woodchip wallpaper that covered the walls of my house when I was small.

20140509_143047

After repeating the process with both halves of the trunk, I used double sided tape to fix the overlaps together, before covering the joins with more tissue, to make the piece look as seamless as possible. There was an occasion where I was short of time, and didn’t have the hairdryer at hand, so I just left the tissue to dry naturally. This does affect the detail of the piece, and I realise now that this was a mistake I will not make again.

20140511_192515Almost completed, and hanging up in my cluttered studio. Still need to remove the cling film though at this stage.

20140518_184959

The finished piece, photographed outside my studio, as I can’t find a white space big enough at the moment

I’m quite pleased with the final result, although I’m unsure whether to spray the piece white, as I’m not terribly keen on the greyish colour of the unbleached tissue. I’m going to leave it as if for the moment, as I’m worried that the texture might become lost if it is covered in paint.

The Beltane Fire Festival

Some  pictures I took last night at the Beltane Fire Festival. Unfortunately, I forgot to put my camera phone on Night settings, and ended up with poor quality images  😦

20140430_213001

 We were greeted on arrival by this “Queen of Hearts” and given a rose

20140430_213817 20140430_213324
20140430_215452IMG_20140501_124418IMG_20140501_123922
IMG_20140501_124712
20140430_222708
20140430_223821
20140430_224021
This exciting performance has prompted me to consider doing some performance or relational art myself, perhaps linked with my own art, or the ritual of dyeing, as Angela suggested. The costumes were also very inspirational, and I feel that I want to make myself a large crown of twigs and flowers to wear!

Dyeing with Grape Hyacinth

When my aunt died a couple of years ago, the only things which I felt I wanted from her house in Sunderland were old family photos and Grape Hyacinths from her garden.I dug them up and brought them home to plant in my garden, and ever since, when they bloom, they remind me of her.

I have quite a lot of them in the front border, and had used them to try a version of eco printing.  I was very pleased with the bright blue stains which had been made. I looked on the internet and found that many people have used them quite successfully to create blue, green and purple dyes, depending on the mordant. I also learned that they originated from the Mediterranean, and were very popular for use in dyeing before the Second World War in Italy.

The only folklore I could find related to the Hyacinth, which was a plant used for protection and for love, and was sacred to Apollo.

20140424_111924

20140424_111920

 Freshly picked and into the dye pot

20140425_182535#1I left the muslin and silk thread in the dye pot for two days, and took them out this afternoon.

20140427_150135

The results were really beautiful- such a gorgeous muted blue on both the silk and the muslin. As with the other muslin, it had been mordanted with Alum and Soda Crystals, but the silk had not been mordanted at all.

20140427_150140

I’m so pleased with this result, in fact I think this is definitely the best result of the dyeing experiments yet. I think that the Grape Hyacinth has been underestimated in terms of its “blueness” as Woad seems to be the plant which everyone raves about whenever blue dye is mentioned.

20140424_115442

I purchased Woad and Weld last week to plant in a patch where I am making a “Herb and Dye” garden. Apparently these plants self seed and spread really vigourously, so I hope I don’t regret planting them, although I’m sure I’ll need quite a lot of them to create some dye. The Woad may be ready for next year, but until then I’m content with the Grape Hyacinth, which doesn’t require loads of preparation and still creates a wonderful colour.

The Beltane Fayre at St. Andrews

20140426_120013

I went to the Beltane Fayre at St Andrews today, as I heard there would be a maypole there….something which is practically non-existant in Scotland. Although rain was forecast, it turned out to be quite bright and dry the further east I drove, and was a lovely sunny day when I reached St Andrews.

It was a mediaeval style event, with re-enactment groups battling with swords, small tents selling mead, traditional silversmithing and copper jewellery, and mediaeval music playing. All the participants wore mediaeval costumes, and many even spoke in  “olde worlde language”…which was a bit embarrassing when being asked “Fair maiden…wouldst thou care to sample my mead ?”

20140426_120733#1

On one of the stalls I met a lady who had samples of dyed wool, and we had a good chat about plants and dyeing techniques. She had some beautiful samples and it was interesting to compare some of the colours she had achieved to the differing results which had occurred on the muslin I had dyed. Wool takes colour much more easily apparently, and this got me thinking that perhaps I should dye some wool, then maybe felt it as part of a larger piece or hanging.

20140426_120738#1 Beautiful samples of dyed wool

20140426_120725After wandering around the stalls for a bit longer I went to watch the maypole dancing. It was being run by the St Andrews Pagan Society, who also had a stall at the fayre. Spectators were offered to participate, but I chose to take photos instead!

IMG_20140426_183623IMG_20140426_182554The custom of dancing around the maypole is an ancient fertility rite, which was usually performed on May 1st (May Day). The custom dates back to ancient times when tree worship was practised, and most of the original maypoles were made from birch trees, which were tall and slim. The maypoles were banned by Puritans in 1644, but erected again in 1660 when Charles II was in power. 
Maypole dances vary slightly from region to region, but the weaving of the two ribbons together to make a third is thought to symbolise the union of two people creating a third.

It was interesting to have seen this custom take place, and the way that the dance performed wove the pattern around the pole, like weaving with a human loom.

Before leaving St Andrews I took a trip to the beach, and found some seaweed to take some prints from. Driving home through Newburgh, I stopped at the Twist Fibre Craft studio where I purchased some wool, having been inspired by the lady at the fayre.

shopwindows

newburgh and marianna 009

Twist Fibre Craft Studio have an amazing selection of wool!

I bought Cheviot, Merino, and some gorgeous Wensleydale Curls. Tomorrow morning I plan to prepare the wool, and then hopefully may be able to start dyeing it in the evening.  All in all, I had a very fruitful and interesting day.

Rashielea Wood

Recently a friend informed me of a local area, Rashielea Wood, where there was a lot of deforestation taking place. I had been discussing the fact that I wanted to find a slim tree trunk to cover in tissue paper, and he suggested I might find one here.

20140508_104213The site was very messy, as he had told me, and there were piles of trunks and branches being left to rot. He had “salvaged” some of this for his wood burning stove, but warned me to take care where I stepped, as there was much unsafe ground around the site.

I had a look around first, and (above) it looked like some kind of apocalyptic nightmare, however to the right of the site, there was a swathe of yellow of gorse bushes, a stark contrast to the devastation of the big tree graveyard.

20140508_105319I also came across some interesting fungi in this area: toadstools, bracket fungus and what I think may be evidence of tinder fungus.

20140508_105134A solitary specimen growing in the midst of bark chippings

20140508_104756

Tree fungus which I think may be sulphur polypore otherwise known as sulphur shelf or chicken mushroom

20140508_104327Some loose bark which appears to have had tinder fungus growing under it

I took the bark (above) away with me, and also found a couple of slim trunks (below) which I think I may be able to use. My next plan is to cover the trunks with tissue paper, to recreate them as a sort of installation. The bark has possibilities too, and I’m thinking that I may use it as a mould to fill with paper pulp, as it is very delicate and will probably break quite easily.

20140508_141845

Tree impressions with Plaster of Paris

Having made some initial impressions of tree knots and bark textures using air drying modelling clay, I decided to see if I could make some replicas using plaster of Paris. I have never ever used plaster of Paris before, so I was a bit apprehensive about the whole experience.

I mixed up two cups of plaster to one cup of water and poured them into two greased sandwich boxes. Then I pressed in my greased modelling clay impressions. After about 5 minutes, curiosity got the better of me and I removed  the modelling clay from the plaster. The impressions weren’t very “impress-ive”, and I got even more impatient and tried to remove the plaster, which subsequently cracked into many pieces! Fail!

I was determined not to give up though, and had a very small amount of alginate put aside to try one rainy day…ironically today was probably the best day of the year, but never mind, it was a day when I had time to myself to get on with work.

20140420_130257

I mixed up 18 grams of alginate with 35ml of water and waited for it to turn pink, before pouring it over the moulds. I found that I didn’t have nearly enough to do all the moulding which I wanted to, so had to make do with just three.

20140420_132020

Having made three moulds, I wanted to keep going, and have another attempt with the Plaster of Paris. This time, I laid two of the smaller alginate moulds into sandwich boxes and poured a small amount of clay over them.

20140420_132938 I left them for ten minutes to set, then carefully peeled them off. The smaller mould worked fine, but the larger mould (on the left) broke up into bits, leaving only the plaster cast, which was actually okay.

20140420_143218

 Again, I’m not sure how I will use these, but I think they may be part of a bigger piece of other fragments of the landscape. I love the whiteness of these pieces, and want to try to keep the minimalist feel to my work. I actually feel a sense of achievement today, although what I have produced isn’t anything innovative or cutting edge, I personally feel that I have made something with a medium which I have never used, and feel a bit excited by the results. I think that it may be something which I experiment with more in future, to make more imprints, perhaps in the form of plaques.